The highest-return Creality K2 mods aren’t hardware at all — they’re the free tuning your Klipper-based firmware already exposes. The K2, K2 SE and K2 Plus run Creality’s Klipper fork, which means pressure advance and input shaping are sitting there waiting to be dialled in. Get those right first, then spend money on the two things that genuinely hold the machine back: CFS feeding reliability and flow ceiling. Everything else is convenience.
Below is a practitioner’s map of what to change, in what order, with the numbers that matter. The K2 Plus baseline you’re modifying: a 350 × 350 × 350 mm build volume, up to 600 mm/s print speed, 30,000 mm/s² acceleration, a 350 °C hotend, a 120 °C bed and a 60 °C heated chamber. It ships with a strain-gauge nozzle probe, dual-Z with four linear rods, FOC step-servos at 32,768 microsteps/rev, and a pressure-sensor active belt tensioner. That’s a capable platform — so mod it deliberately, not reflexively.
Start with the free mods: tuning your Klipper firmware
Factory auto-calibration is a starting point, not the last word. The stock resonance and flow calibration gets you in the ballpark; it doesn’t account for your specific filament or any mass you later bolt onto the toolhead.
- Pressure advance per material. PLA and PETG behave completely differently at the corners. Run a dedicated pressure advance tower for the filament you actually print most, not a single global value. This is the single biggest quality gain you can make for £0.
- Input shaping — and re-run it after any toolhead change. The input shaper is calibrated for a specific mass and acceleration. Change the fan duct, swap the hotend or hang anything off the head and the shaper becomes ineffective. Re-run the resonance test whenever the toolhead weight changes. This is exactly why a heavier aftermarket hotend can make ringing worse if you don’t recalibrate.
- Flow calibration after any nozzle or hotend swap — see the FlowTech section below.
If you’re unsure which slider to move when a print goes wrong, our Diagnose tool tells you the exact setting to change from a photo, rather than leaving you to guess. And before you send a big job, run it through a pre-flight g-code check to catch the failures that waste hours.
CFS reliability: the mods that actually stop failures
If you bought the Combo, the CFS is where you’ll spend most of your fiddling time. It holds four 1 kg spools (197–202 mm diameter, 42–68 mm width), and units chain together for up to 16 colours. The recurring pain point is feeding: filament exits the CFS but doesn’t reach the extruder, and the system throws “filament might be tangled” alongside FR2833 (feed issue) or FR2832 (retract issue).
The root cause is almost always slack and pinch points in a long filament path. The stock 40 and 50 cm PTFE tubes create both. The two cheapest, highest-impact CFS mods:
- Capricorn PTFE replacement. Lower-friction, tighter-ID tubing cuts the slack that drives FR2833/FR2832. If you reposition the CFS, keep the tube run free of sharp bends — that’s Creality’s own guidance and it matters more than tube length.
- Desiccant discipline. Watch the humidity indicator: green = fine, orange = slightly high, red = very high and time to replace or regenerate the desiccant. Wet filament isn’t just a quality problem in the CFS; it aggravates feed jams.
Beyond that, a printed inline filament filter at the CFS inlet keeps dust out of the path — you’ll need four filters and four PC4-M10 connectors for a full unit. Some designs accept Capricorn XS tubing (1.9 mm ID) to straighten the tight bend at the spool end before filament enters the CFS. Printed CFS risers and mounts improve the feed angle and add anti-slip footing, which quietly reduces mis-feeds on multi-colour jobs.
One honest limitation: the CFS internals ship partly as compiled objects only (the box_wrapper, filament_rack_wrapper and serial_485_wrapper Python .so files), so you can’t rewrite its logic. You’re modding the physical path, not the software. And note the “no TPU/PVA” caveat you’ll see quoted is really a CFS multi-material feeding limitation — the direct-drive extruder itself has run TPU for users. Don’t let a retailer spec sheet talk you out of flexibles on the direct path; just don’t expect to feed them through the CFS.
DIY heated-CFS builds exist (some repurpose Space Pi Dryer parts). They work, but you’re building a heated enclosure around plastic and electronics — treat the temperature and fire risk seriously, or stick to desiccant.
Hotend: the Micro Swiss FlowTech flow-ceiling mod
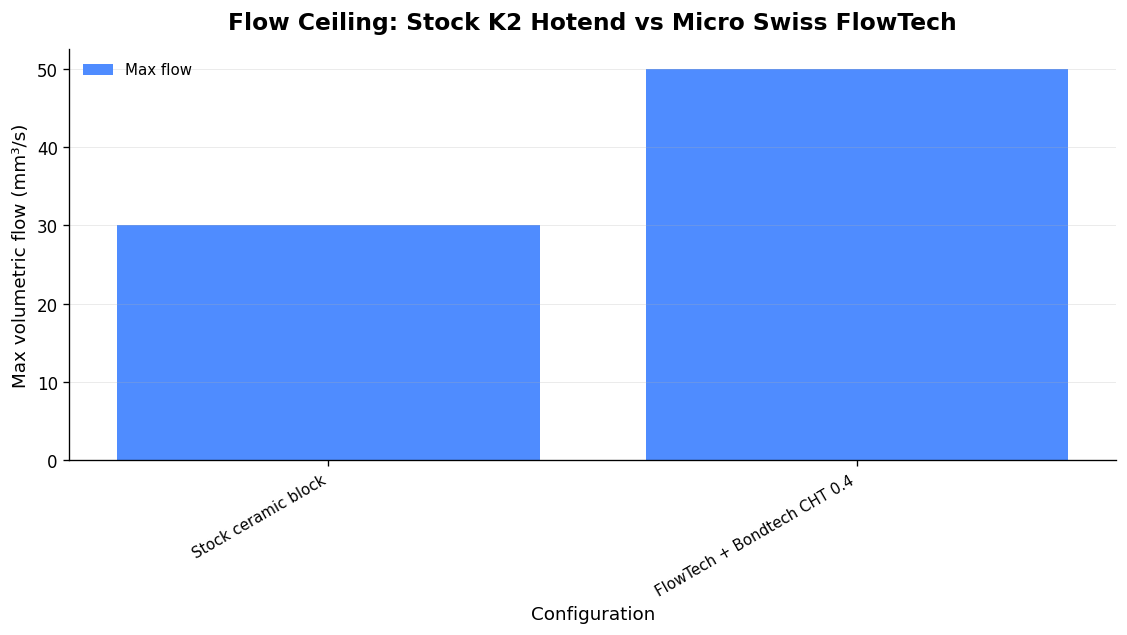
The stock K2 ceramic heater block tops out around 30 mm³/s. That’s fine at sane speeds, but it’s the real limit when you chase the headline 600 mm/s. The Micro Swiss FlowTech is a drop-in upgrade for the K2 Plus: nozzle and thermal break are fused into one permanently sealed, leak-proof assembly, it supports one-handed cold nozzle changes (no hot-tightening), and it’s rated to 350 °C. Paired with a Bondtech CHT high-flow 0.4 mm nozzle it lifts flow to about 50 mm³/s — a 66% gain.
| Spec | Stock K2 ceramic block | Micro Swiss FlowTech + Bondtech CHT 0.4 |
|---|---|---|
| Max volumetric flow | ~30 mm³/s | ~50 mm³/s (+66%) |
| Max temperature | 350 °C | 350 °C |
| Nozzle change | Hot-tighten | Cold, one-handed |
| Abrasive option | — | CM2 hardened-steel nozzle |
| Toolhead weight impact | Baseline | Near-identical (minimal recal) |
Two things to get right. First, order the K2 Plus edition specifically — the K2 Plus uses different thermistor parameters than the K2 and K2 Pro, so select the correct model before you buy or your temperatures will read wrong. Second, if you print carbon-fibre or other abrasives, get the CM2 hardened-steel nozzle; a standard brass tip will wear out fast. The near-identical weight means your input shaping barely shifts — but re-run flow calibration regardless, because the CHT nozzle’s melt behaviour is different from stock.
Probe: Cartographer scanning mesh (verify Plus fitment)
The stock prtouch nozzle sensor is slow, throws false hits on a dirty nozzle, and does nothing about bed warp. An inductive Cartographer scanning probe (~7 µm resolution) produces a 25×25 mesh in about a minute, with accuracy that’s independent of nozzle gunk, and — combined with axis_twist_compensation — cancels gantry tilt. It’s a genuine upgrade for anyone printing large first layers.
The catch: the common Printables mounting bracket (model 1211161 — 4× 4×2 mm magnets, M2.6×20 screws, y-offset −13 mm) lists compatibility as K2 / K2 SE. K2 Plus fitment of that specific bracket isn’t confirmed. If you’re on the Plus, verify the bracket before buying the probe — budget roughly £65–£90 for the probe plus print time, and expect a hard install with firmware config work.
Build plate and bed
The supplied textured PEI sheet picks up grease fast and goes patchy after a few hundred prints. A spare smooth or textured PEI plate is the cheapest worthwhile upgrade at £15–£25; Creality’s official K2 Plus frosted PEI plate sits around the same price. Keep one degreased plate purely for PETG and one for everything else.
Some early batches shipped with a warped bed. Be realistic about what auto-levelling can and can’t do: even with ABL, if the bed itself is warped the printed model follows the surface — mesh compensation corrects Z per point, it doesn’t flatten physics. A kinematic bed mount is the end-game fix, but it’s an advanced job; first confirm the warp with a scanning probe or a straightedge and feeler gauges before you throw parts at it.
Printed convenience mods (free STLs)
- Poop chute + waste bin — the most-downloaded category for a reason. The good sets mount to the K2 Plus waste outlet using the original screws and drop into a removable bin hooked to existing rear screws. Variants use 6×2, 6×3 or 8×3 mm magnets; most print support-free.
- Spool holders, tool caddies and cable-chain droop fixes — small quality-of-life wins.
- LED light kits — genuinely useful for monitoring and camera-based failure detection.
Firmware: root only when you’re ready
If you want full control, the community path is k2-improvements (jamincollins) plus Mainsail-K2 or Fluidd-K2: one command to root, then full Moonraker, Entware and SSH access with a modern UI instead of the stock interface. Works on K2 / K2 SE / K2 Plus, costs nothing — and voids your warranty with a real brick risk. If you only want remote monitoring and AI failure alerts, OctoEverywhere gives you that for free.
Our standing advice: don’t flash unofficial firmware on a machine with a proprietary CFS and bed-levelling probe unless the community build is mature and well documented — an unofficial flash can break the exact features you rely on. Wait for stable, then root with intent, not curiosity.
The order that actually works
- Calibration first — pressure advance, input shaping, flow. Free, biggest quality gain.
- Reliability — spare PEI plate, Capricorn PTFE + desiccant for the CFS, cable management.
- Capability — FlowTech hotend if you print fast or abrasive; Cartographer if bed warp or levelling speed frustrates you.
- Workflow — poop chute, spool holders, tool caddy, lighting.
Resist the temptation to crank acceleration past stock. The K2 Plus is already fast at 30,000 mm/s²; pushing further usually costs you surface finish and dimensional accuracy for a marginal time saving. If you’re weighing which upgrades pay off on the sister machine, our breakdown of K2 Plus mods worth doing (and the ones to skip) goes deeper on the trade-offs.
FAQ
Can the Creality K2 print TPU?
The direct-drive extruder can run TPU on the direct path — users have done it. The “no flexibles” line refers to the CFS multi-material system, which struggles to feed soft filament along its long path. Load TPU directly, not through the CFS, and slow your retractions.
What causes CFS error FR2833 and FR2832?
FR2833 is a feed issue and FR2832 is a retract issue — both usually caused by slack and pinch points in the stock PTFE path. Replace the tubes with Capricorn, remove sharp bends, keep desiccant fresh (watch for the red humidity indicator), and add an inline filter.
Is the Micro Swiss FlowTech worth it on the K2 Plus?
If you print fast or use abrasive filaments, yes — it raises flow from ~30 to ~50 mm³/s and adds cold, one-handed nozzle swaps. Order the K2 Plus edition (different thermistor parameters), fit the CM2 hardened nozzle for carbon-fibre, and re-run flow calibration after installing.
Will rooting the K2 void my warranty?
Yes. The k2-improvements route gives you full SSH and Mainsail/Fluidd, but it voids warranty and carries a brick risk. If you only need remote monitoring and print-failure alerts, use OctoEverywhere instead and leave the stock firmware intact.
Related: Creality K2 Upgrades: What’s Worth Doing (and What to Skip)