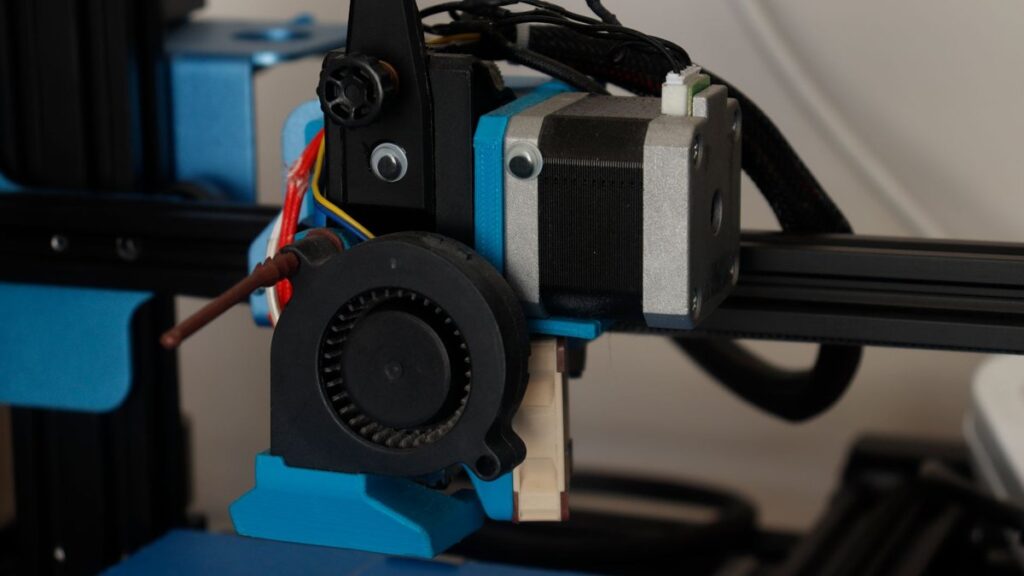
The highest-value Creality K2 upgrades cost nothing: the K2 Plus runs Creality’s Klipper-based firmware, so input shaping and pressure advance are already sitting in the machine waiting to be tuned properly. Everything else — a scanning probe, a high-flow hotend, CFS reliability fixes — earns its place only once you’ve squeezed the free wins out of the calibration you already own. This guide sorts the upgrades that measurably improve prints from the ones that mostly move money around, with the real specs and part numbers so you order the right thing the first time.
Quick baseline so the claims make sense. The K2 Plus gives you a 350×350×350 mm build volume, up to 600 mm/s print speed, 30,000 mm/s² acceleration, a 350 °C tri-metal “Apus” direct-drive extruder, a 120 °C bed, an active chamber to 60 °C, dual Z with four linear rods, FOC step-servos at 32,768 microsteps/rev, and a pressure-sensor-driven active belt tensioner. It is already a fast, well-instrumented machine. That matters, because a lot of “upgrades” are just fixing things the hardware already does well if you calibrate it.
Start with the free software upgrades
Factory auto-calibration is a starting point, not the final word. Two settings do most of the heavy lifting on any fast printer, and both are free:
- Pressure advance. Run a dedicated PA tower for the filament you print most. PLA and PETG behave very differently — a PA value tuned on PLA will leave PETG with rounded corners or bulging seams. Re-run it per material family, not once.
- Input shaping (resonance). Re-run the resonance test after you add any mass to the toolhead — a new hotend, a probe, a different fan shroud. The shaper frequencies are specific to the current moving mass; change the mass and the old numbers are stale.
One caution: the K2 Plus is already fast. Cranking acceleration far beyond the tuned defaults almost always reduces quality rather than saving meaningful time — ringing and corner bulge show up long before you feel the clock. Chase flow and consistency, not headline speed. If you’re seeing gaps or thin walls, our guide on how to fix under-extrusion in the right order will get you further than any hardware swap.
Root access: the foundation for everything advanced
Most of the worthwhile hardware and monitoring mods need root. The old Guilouz Helper Script does not support the K2 — the author dropped it. The working path today is k2-improvements by jamincollins, paired with Mainsail-K2 or Fluidd-K2: a single command gets you root, current web UIs, Moonraker and Entware.
The process, in order:
- Do a factory reset first to avoid conflicts with earlier tinkering.
- Back up
printer.cfgand your config snapshot. Bricks are possible; the backup is your undo button. - Enable root on the physical screen: Settings → General → root.
- Root ships with the default password
creality_2024. Runpasswdand change it immediately — the machine is on your network.
On warranty: the picture is genuinely inconsistent across sources. Third-party guides state that rooting voids warranty, while Creality’s own K1-series firmware notes say a rooted device still gets after-sales hardware service within the warranty period but no technical support. That K1 wording may not carry over to the K2, so check the current K2 policy before you commit. If you’d rather not root at all, the free browser tools at Ask The Nozzle plug into your existing slicer without touching the printer’s firmware.
Remote monitoring: skip the subscription
Creality Cloud is slow outside China and gates camera streams behind a subscription. Once you’re rooted, OctoEverywhere installs via a single curl command and is free, with Gadget AI failure detection and push notifications. Obico (open-source) and Mobileraker are solid alternatives. One network gotcha worth knowing before you troubleshoot connectivity: the K2 only speaks 2.4 GHz Wi-Fi, not 5 GHz.
Hotend and flow: Micro Swiss FlowTech
The stock tri-metal nozzle is rated for up to 40 mm³/s flow (one third-party source pegs the ceramic block nearer 30 mm³/s — the figure is contested, so treat 40 as the manufacturer number and don’t assume you’ll hit it cold). If you’re volume-limited on large PETG or engineering prints, the Micro Swiss FlowTech hotend paired with a Bondtech CHT high-flow 0.4 mm nozzle lifts flow to around 50 mm³/s.
What makes FlowTech worth it beyond raw numbers: nozzle and thermal break are a single permanently sealed assembly, so it’s leak-proof, and nozzle changes need no hot-tightening — one-handed, cold. Hardened steel handles abrasives like PA-CF and PA6-CF20. Its weight is near-identical to stock, so your existing calibrations barely move.
Order the right variant. The K2 Plus uses different thermistor parameters from the K2 and K2 Pro — select your exact model at checkout:
| Model | Thermistor config | Max nozzle temp | Firmware change? |
|---|---|---|---|
| K2 / K2 Pro | M3115 | 300 °C | None |
| K2 Plus | M3111 | 350 °C | None |
Because the thermistor configs are matched to each model, no firmware changes are needed — but if you order a K2 config for a K2 Plus you’ll get wrong temperature readings. Confirm the exact FlowTech part number against your model before buying; marketplace listings show numbers like M3102/M3103/M3105 across the range, so match by config, not by guesswork.
Bed levelling: Cartographer probe
The stock prtouch sensor lives in the nozzle. It’s slow, throws false hits on a dirty nozzle, and does nothing for actual bed warp. The Cartographer inductive scanning probe is the meaningful fix: a 25×25 mesh in about a minute, accuracy independent of nozzle gunk, and — combined with axis_twist_compensation — it cancels gantry tilt as well.
| Detail | Spec |
|---|---|
| Mount | Printables 1211161 bracket |
| Hardware | 4× 4×2 mm magnets, M2.6×20 screws |
| Y-offset | −13 mm |
| Cost | ≈ £65–90 (roughly $80–110) |
| Difficulty | Hard — needs root first |
| Models | K2 / K2 SE |
Known niggle: the stock USB cable can make poor contact and cause printing errors. There’s a printed “USB Saver” part that clamps the connection — print it before you rely on the probe. This is a proper upgrade, not a quick one; only do it if you’re printing large flat parts where bed flatness genuinely limits you.
Build surface: the cheapest upgrade that matters
The supplied flexible PEI plate is fine, but textured PEI picks up grease and goes patchy after a few hundred prints. A spare PEI sheet is £15–£25 and the best value on this list. Run two: one for high-temp engineering filaments, one for everyday PLA. Wipe both with isopropyl alcohol and stop touching the print area with bare hands — most “adhesion failures” on a K2 are skin oils, not the plate wearing out.
CFS reliability: fix the real pain point
The Creality Filament System holds four 1 kg spools (197–202 mm diameter, 42–68 mm width), does automatic RFID recognition, and chains up to 16 colours across units. It’s also where most K2 owners actually lose prints. The failures are mechanical and predictable:
- Long, slack filament path. The route from CFS to extruder is long. Third-party guidance suggests stock PTFE lengths of 40 and 50 cm create slack and pinch points, and dropping to 30 and 40 cm helps — but confirm against Creality’s wiki before you cut anything, as the “official” lengths aren’t nailed down across sources. Whatever you do, avoid sharp bends if you reposition the unit.
- Drive-gear crumbs. On multi-material setups, periodically open the extruder and check for small plastic crumbs near the drive gears. They’re the hidden cause of recurring jams that survive every other fix.
- Buffer jams. Error codes like
FB2864orFB2846and “filament might be tangled” messages usually trace back to the buffer or a tangle — sometimes only cleared by a power-cycle. Treat repeated occurrences as a path/tension problem, not a fluke.
CFS placement: the extension cable mod
Out of the box the CFS cables are only 45 cm — long enough to sit the unit on the printer lid and nothing more. Remove the lid and you have to unplug the CFS; it won’t reach a shelf beside the printer. The fix is Creality’s CFS Extension Cable kit (100 or 150 cm), routed through the cable channels. Cheap, low-risk, and it makes lid access sane.
TPU and drying: know the limits before you buy filament
Set expectations here rather than fighting the machine. Per a retailer FAQ, the K2 Plus does not properly support flexible materials like TPU, or wet filaments such as PVA/BVOH through the CFS. The mechanism is straightforward: TPU is softer than PLA and deforms under the drive-gear pinch, so even direct-bowden TPU 95A skips above about 60 mm/s, and pushing it through 2+ metres of PTFE and tight CFS bends makes it concertina and jam. Some spec sheets do list TPU — the accurate nuance is “no TPU via CFS, limited and slow via direct feed.” If flexibles are your main job, this isn’t the printer for them.
On drying: the CFS is passive. Its humidity indicator (green = fine, orange = slightly high) tells you the problem but doesn’t solve it. For hygroscopic engineering filaments — PA-CF, PA6-CF20 — dry before printing regardless of what the CFS reads, or you’ll chase stringing and voids that no slicer setting fixes. Speaking of which, if PETG stringing is your issue, it’s almost always temperature and retraction, covered in our PETG stringing fix.
Where to spend, in order
| Upgrade | Cost | Effort | Worth it? |
|---|---|---|---|
| Pressure advance + input shaping tuning | £0 | Low | Always — do this first |
| Spare PEI plate | £15–25 | Low | Yes — best value |
| CFS extension cable + PTFE tidy-up | Low | Low | Yes if you run CFS |
| Root + OctoEverywhere monitoring | £0 | Medium | Yes — enables the rest |
| FlowTech + Bondtech CHT hotend | Moderate | Medium | Only if flow-limited |
| Cartographer probe | £65–90 | Hard | Only for large flat parts |
FAQ
Does rooting the Creality K2 void the warranty?
It’s inconsistent across sources. Third-party guides say yes; Creality’s own K1-series firmware notes say a rooted device keeps hardware after-sales cover but loses technical support. That wording may not transfer to the K2, so verify the current K2 policy before rooting, and always back up printer.cfg first.
What’s the best cheap upgrade for the K2?
A spare textured PEI sheet at £15–25, plus properly tuning pressure advance and input shaping for your main filaments. Together they fix more real-world print failures than any single hardware swap.
Can the K2 Plus print TPU?
Not reliably. It doesn’t support flexibles via the CFS, and even direct-fed TPU 95A skips in the drive gear above roughly 60 mm/s because the material deforms under pinch. If TPU is your priority, choose a different machine.
Do I need a firmware change when fitting a FlowTech hotend?
No — the K2, K2 Pro and K2 Plus FlowTech variants use matched thermistor configs (M3115 for K2/K2 Pro to 300 °C, M3111 for the K2 Plus to 350 °C). Just make sure you order the variant for your exact model, or temperature readings will be wrong.
Before you commit a long print to any new hardware, it’s worth running the plate through a pre-flight check — heat build-up and warp on tall engineering parts show up in simulation long before they ruin a 12-hour job. That’s the whole point of catching problems on screen instead of on the plate.
Related: Creality K2 Plus Mods: The Upgrades That Actually Fix the Machine