If you’re hunting for custom race engine components in the UK, you’re almost certainly juggling two realities: the parts that have to be machined from billet metal, and the parts where additive manufacturing and 3D printing now genuinely earn their place. We’re Ask The Nozzle — a 3D-printing AI for makers who slice their own gcode — so we’ll be straight with you about where printing belongs in a race engine build, where it doesn’t, and how to get printed parts that actually survive an engine bay.
This isn’t a hype piece about printing a cylinder head in your shed. It’s a practical guide to sourcing and producing custom race engine components in the UK, the materials and tolerances that matter, and how to stop functional parts failing before they reach the dyno.
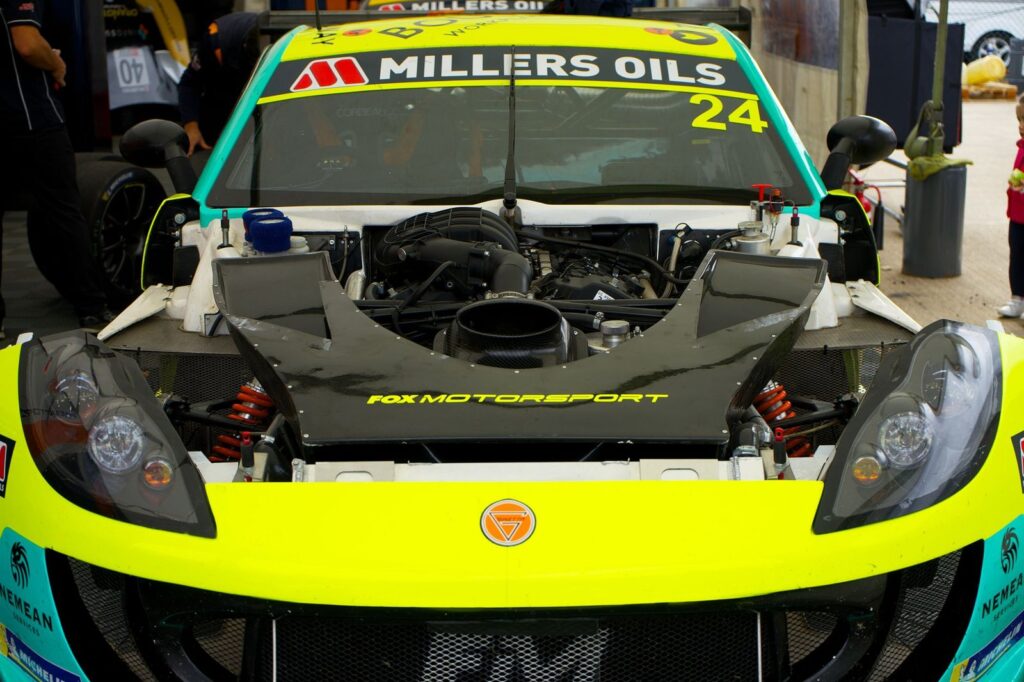
What “custom race engine components” actually covers
In UK motorsport — from club-level hillclimb cars to professional touring and single-seater programmes — “custom race engine components” is a broad church. It spans:
- Load-bearing metal parts: con-rods, pistons, crank pulleys, billet brackets, manifolds. These are CNC-machined, forged or cast — not the domain of desktop printing.
- Airflow and induction parts: intake plenums, velocity stacks, throttle body adapters, airbox sections. These are increasingly prototyped and even end-produced with additive manufacturing.
- Jigs, fixtures and tooling: assembly jigs, drill guides, gasket templates, mock-up parts. This is where desktop 3D printing pays for itself fastest.
- Ancillary brackets and housings: sensor mounts, loom guides, ducting, cosmetic covers. Functional printed parts in PETG, ABS/ASA, polycarbonate or nylon composites do real work here.
The smart move is to split your bill of materials by duty. Anything seeing combustion pressure, high cyclic load or sustained temperatures above what a thermoplastic can take goes to a machinist. Everything else is a candidate for in-house printing or printed-pattern casting.
Where UK makers get sourcing right (and wrong)
For machined metal components, the UK has a deep bench of motorsport-grade suppliers clustered around the “Motorsport Valley” corridor — Oxfordshire, Northamptonshire and the Midlands. When you commission billet or forged race engine parts, push for:
- Documented tolerances on every critical dimension, not just a drawing handed over the counter.
- Material certs for the alloy used (7075-T6, 4340, Inconel where exhaust-side heat demands it).
- A first-article inspection before a production run. One measured part now saves a scrapped batch later.
Where makers get burned is treating 3D-printed parts the same as machined ones — assuming a part that “looks fine” off the bed is dimensionally and mechanically sound. It usually isn’t, unless your slicer settings and material choice match the job. That’s the gap we built our tools to close — including our own free ATN Slicer, a fork of OrcaSlicer with a pre-flight engine built right in, so bad settings get flagged the moment you slice rather than after a scrapped part.
3D printing’s real role in race engine builds
Additive manufacturing won’t replace your machinist, but it compresses your development loop dramatically. Three uses dominate:
1. Rapid prototyping before you commit to metal
Print an intake plenum or bracket in PLA or PETG, test-fit it in the engine bay, check clearances against the bonnet line and ancillaries, then iterate the same afternoon. You’ll catch packaging clashes that a CAD model on a screen hides. Only when the geometry is proven do you spend money on the CNC version.
Related: if you’re building induction for a specific engine, see this guide from our motorsport partner on the Peugeot GTi6 ITB kit (@ GMR – Graham Martin Racing).
2. Printed patterns for casting
For low-volume cast aluminium parts — runners, housings, certain manifold sections — a 3D-printed pattern lets a foundry produce sand-cast or investment-cast components without the cost of hard tooling. Surface finish and dimensional stability on the pattern directly determine casting quality, so this is a job where print quality genuinely matters.
3. End-use functional parts
Sensor brackets, loom routing, cold-side ducting and cosmetic covers can be printed in the right engineering polymer and used as-is. The trick is matching material to the thermal and mechanical environment:
- ASA — UV-stable, good for under-bonnet brackets away from direct heat. Glass transition around 100–110 °C.
- Polycarbonate — high stiffness and heat resistance, but demanding to print (high temperatures, dry filament, enclosure essential).
- Nylon (PA) with carbon or glass fill — excellent stiffness-to-weight and fatigue resistance for functional brackets; hygroscopic, so dry it religiously.
- PETG — fine for prototypes and low-stress, low-heat parts; not your choice anywhere near the exhaust side.
Rule of thumb: if the part lives within reach of exhaust heat or sees sustained load, you need an engineering polymer printed with a controlled chamber temperature — or you need metal. Don’t kid yourself with PLA.
Getting functional printed parts right the first time
Functional motorsport parts fail for boring, fixable reasons: weak layer adhesion, warping on big ABS/ASA prints, poor first layers throwing off dimensional accuracy, and stringing that ruins sealing faces. These are slicer-and-process problems, not magic. If you want the deeper diagnosis, see what causes print failure and how to fix them.
This is exactly where Ask The Nozzle is built to help. The simplest route is to slice the part in our free ATN Slicer (Windows 10/11) — it’s OrcaSlicer-based, so all the setting names and locations are identical to Orca, but the pre-flight engine runs the moment you slice and the Diagnose and Ask AI panels sit right beside the gcode preview. It flags settings that will sabotage a load-bearing part — wrong perimeter count for the stress path, infill too low for fatigue, temperatures that won’t bond layers properly — before you waste filament. If you’d rather not install anything, you can still run the same engine in the browser: drop your gcode into the rule-based Pre-flight checker for one credit, whatever slicer produced it.
When a print does fail, photograph it and feed it to our vision-AI Diagnose tool — available right inside the ATN Slicer’s Workshop panel, or in the browser. It identifies the defect — delamination, warping, under-extrusion — and returns concrete, slicer-specific fixes; PrusaSlicer and OrcaSlicer users can also download an importable .ini patch so you’re not guessing at numbers. And if you want to talk through a material choice or a tolerance question, the open-ended Ask chat is grounded in real-world cases rather than the confident nonsense generic chatbots produce.
A sensible UK workflow for custom race engine parts
- Classify the part by duty — combustion/high-load metal, or ancillary/airflow polymer.
- Prototype the polymer-eligible parts in-house to lock geometry and clearances.
- Validate slicer settings by slicing in the ATN Slicer so pre-flight runs automatically (or run gcode through the browser Pre-flight checker) before committing hours of print time.
- Choose the right engineering material for the thermal and load environment.
- Send metal parts to a UK motorsport machinist with documented tolerances and material certs.
- Inspect first articles — printed and machined — before any batch.
Run it this way and you cut weeks out of development, spend metal money only on proven geometry, and end up with printed parts that actually hold up under load and heat. Download the free ATN Slicer for Windows and let it catch the failure before you press print.
FAQ
Can you 3D print actual race engine internals?
Not on a desktop FDM machine. Combustion-facing and high-load internals — pistons, rods, valves — need machined or forged metal. Desktop printing’s role is prototyping, casting patterns, jigs, and ancillary brackets in engineering polymers.
What material should I use for under-bonnet printed brackets?
For brackets away from direct exhaust heat, ASA or a carbon-filled nylon gives good heat resistance, stiffness and UV stability. Polycarbonate handles more heat but needs an enclosure and dry filament. Avoid PLA and keep PETG to low-heat, low-stress parts.
How do I stop functional prints failing under load?
Most failures trace back to layer adhesion, infill and perimeter choices, and dimensional drift. Slice in the ATN Slicer so its built-in pre-flight check validates your gcode automatically before printing (or use the browser pre-flight check with any slicer), and use a vision-AI diagnosis on failures to get exact slicer corrections rather than trial-and-error.
Where do I source machined custom race engine components in the UK?
The UK’s Motorsport Valley region (Oxfordshire, Northamptonshire and the Midlands) hosts numerous motorsport-grade machinists. Insist on documented tolerances, material certificates and a first-article inspection before any production run.
Related: OrcaSlicer First Layer Adhesion Settings: The Exact Values That Make Prints Stick
Related: G-code Checker Before Printing: Catch Failures Before They Cost You
Related: Motorsport 3D Printing in the UK: Where Additive Manufacturing Actually Earns Its Place